Photoshop is a designers favourite paradise, this is where you can spark magic in any image or create something extraordinary.
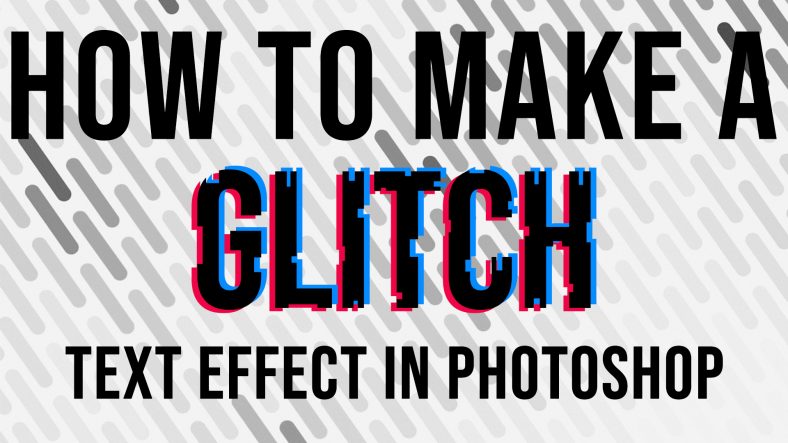
In our photoshop series, today we’re going to talk about how to make a Glitch effect in photoshop
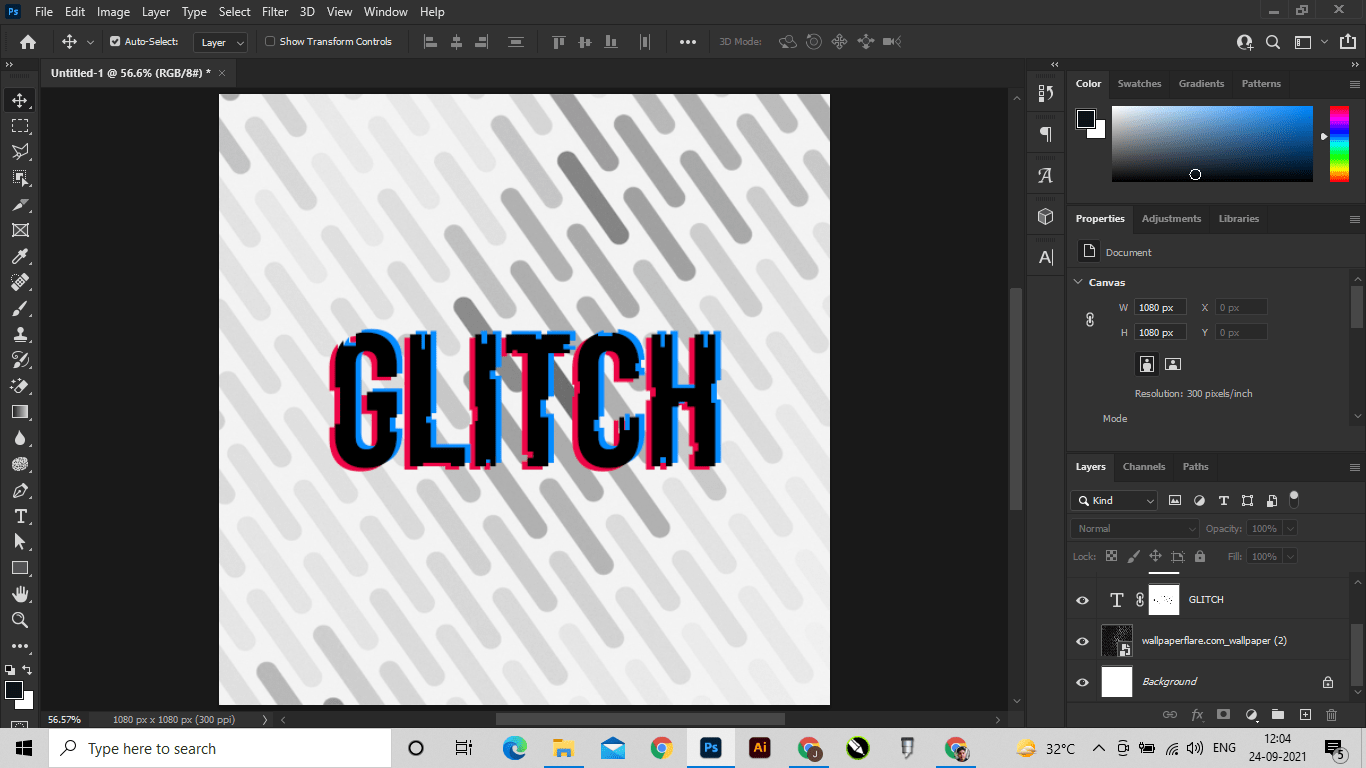
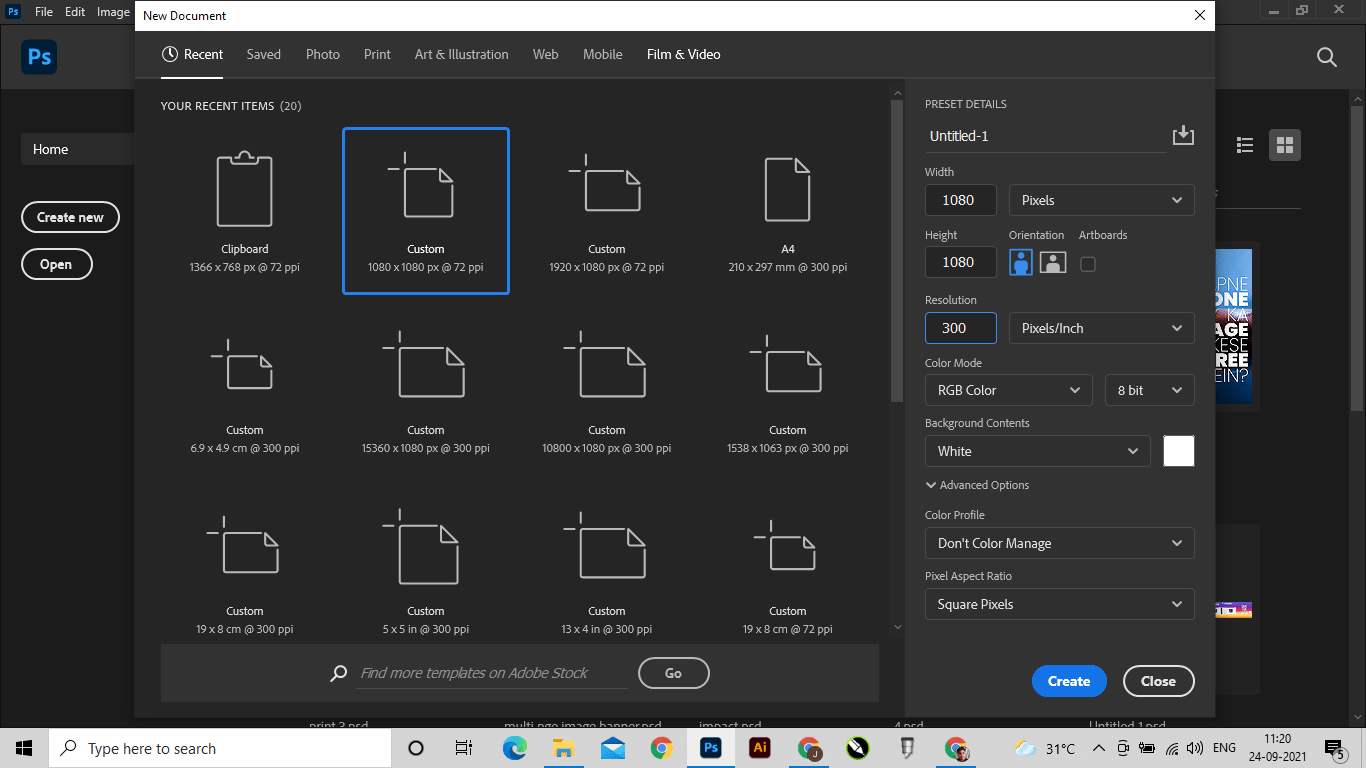
Step 1: Open Photoshop, then click on new document and make a document of size 1080px x 1080px or you can choose any size.
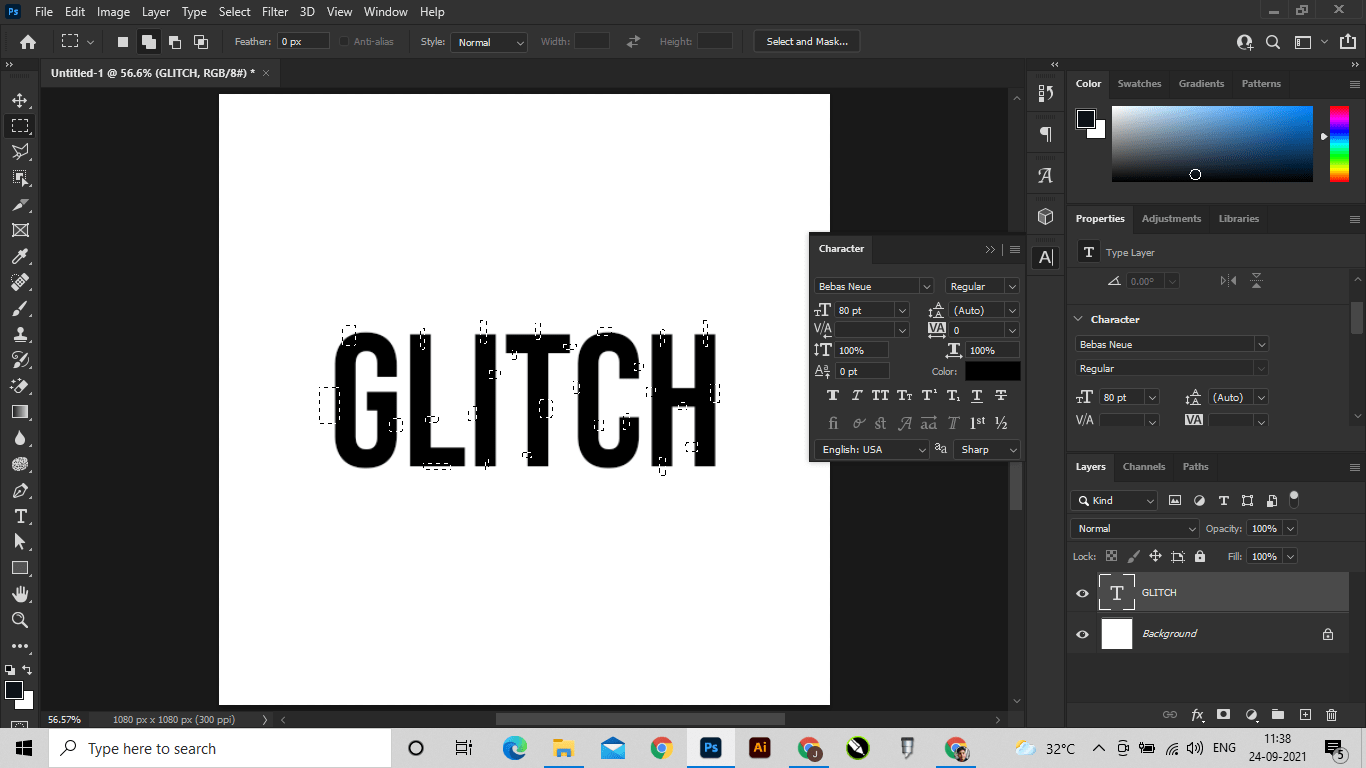
Step 2: Type a word of your choice and centre align, you can increase the font size according to your preference.

Step 3: Select the rectangular marque tool, select ‘add to selection’ option and make random selections of the text just like shown in the picture.
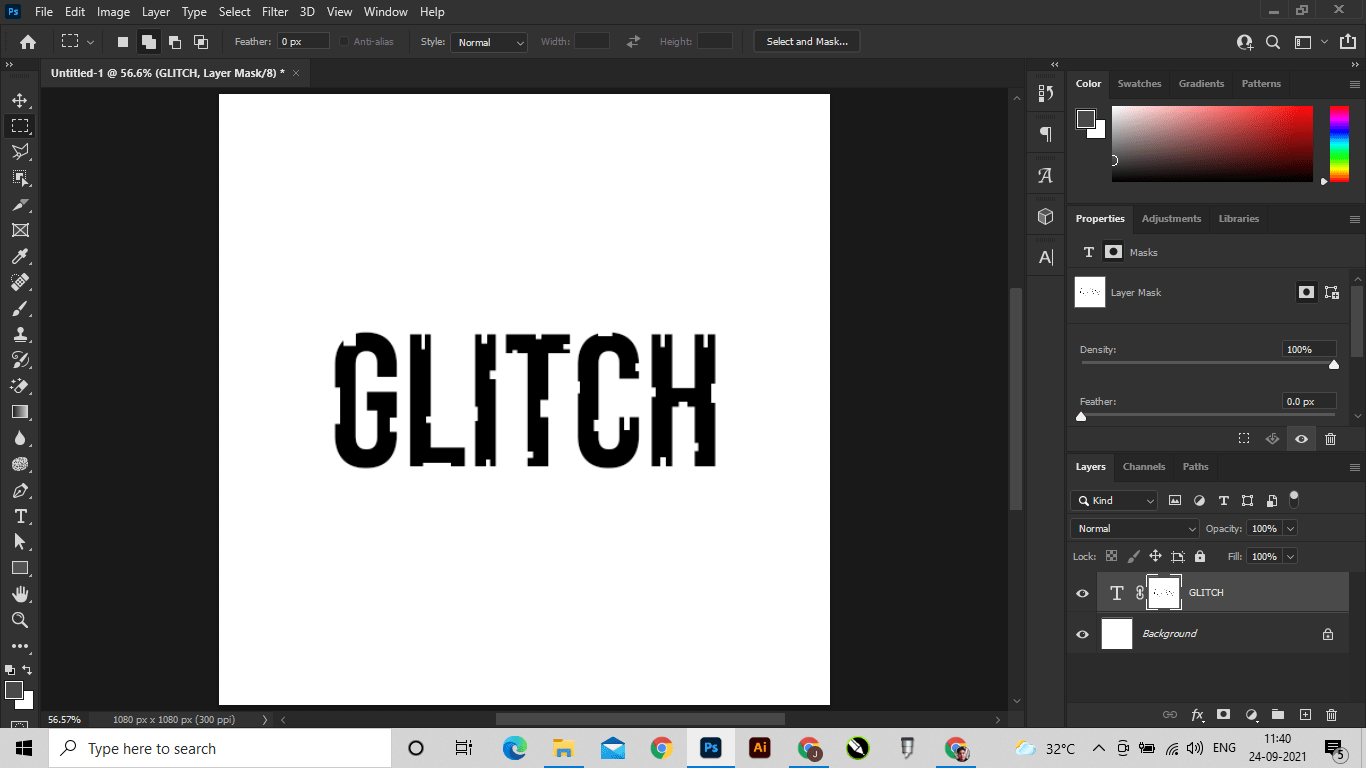
Step 4: Go to the layers panel and select the text layer and select add to the layer mask.
You will see something like this…….

Press (Ctrl + I)
And you will see something like this……
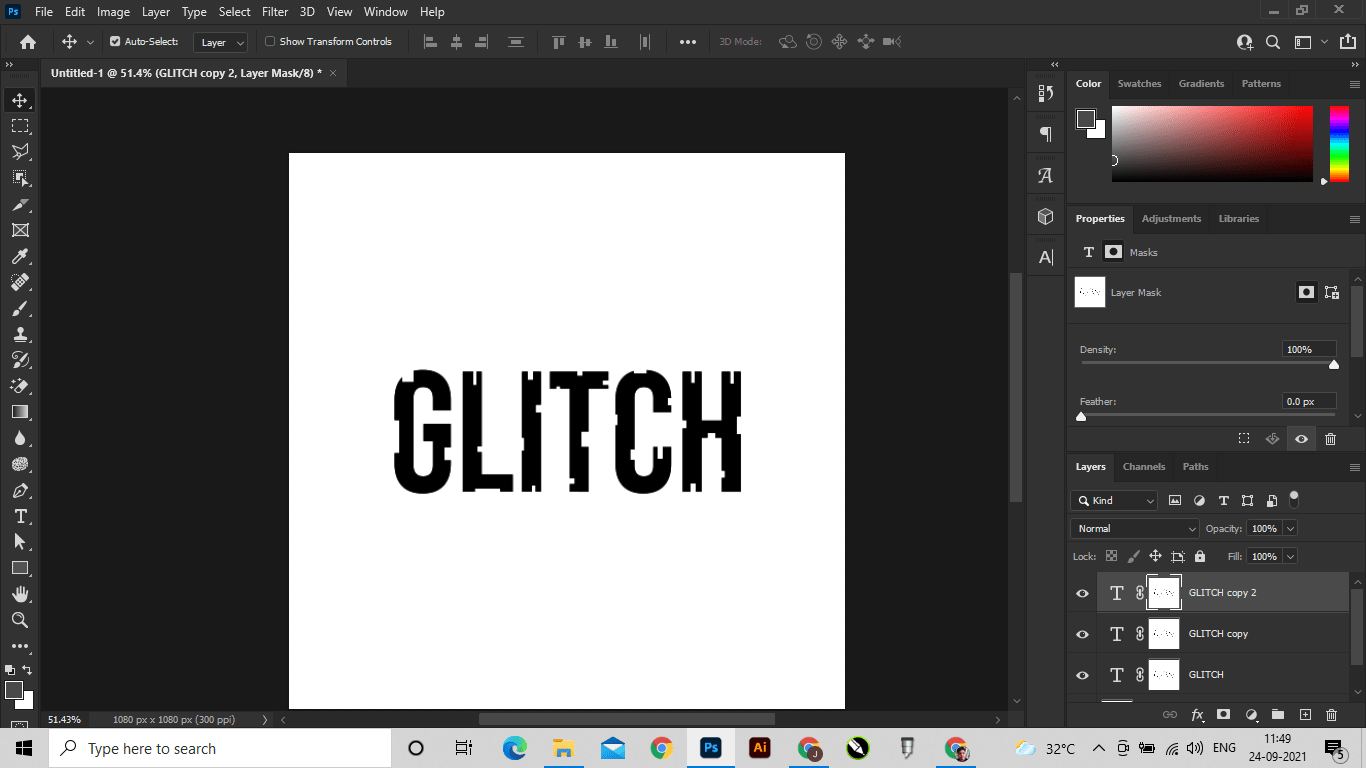
Step 5: Make 2 duplicates of the text layer, by pressing (Ctrl + J) 2 times.
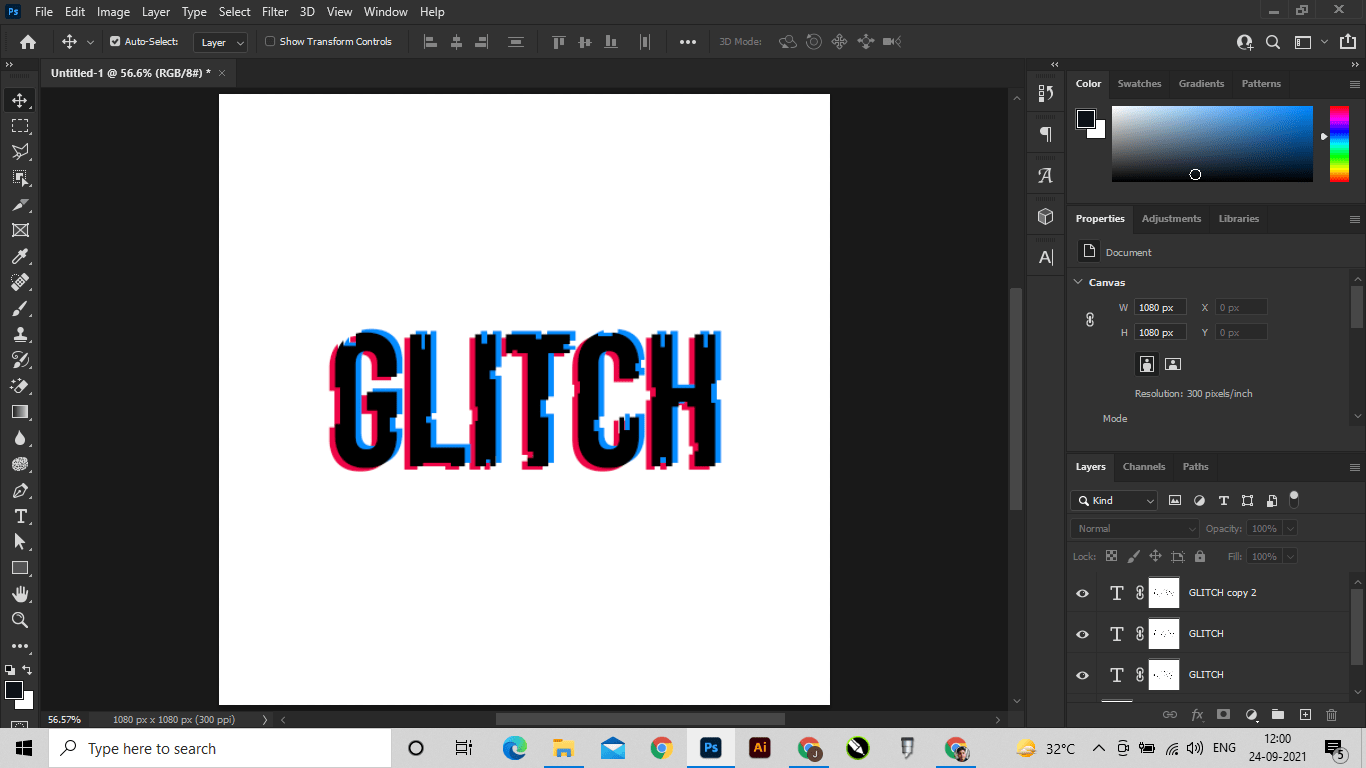
Step 6: Select the 2nd text layer and colour it blue (colour code – 048cff), and now select 3rd text layer and colour it pink (colour code – ee0547).
Step 7: Select the blue-coloured text layer and drag it to the left and downward direction, and then select the red-coloured text layer and drag it to the right and upward direction with the help of arrow keys.
*note: don’t drag too much
Step 8: Finally add a background, and you’re done.